You boot up a new game. Excitement builds. You hit “Play” and then… stutter. Freeze. Lag. Your frame rate tanks to single digits while the game “compiles shaders.” Five minutes pass. Sometimes ten. Your GPU sits there grinding away while you stare at a progress bar.
This is shader compilation lag. It happens on first launch. It happens after driver updates. Sometimes it happens randomly when you least expect it.
I learned this the hard way back when Elden Ring launched. My RTX 3080 build should have crushed it. Instead, I spent twenty minutes watching a shader compilation screen. Then the stuttering started during actual gameplay. Every new area triggered more compilation. It was brutal.
This guide will dig into what actually causes shader compilation stutter. We’ll cover how shader cache works across NVIDIA, AMD, and Intel GPUs. You’ll learn when to clear your cache and when to leave it alone. We’ll also look at game-specific solutions and monitoring tools that actually help.
The reality is shader cache management isn’t complicated once you understand the basics. Let’s fix this problem for good.
What Shader Cache Really Means (And Why First Launch Feels Broken)
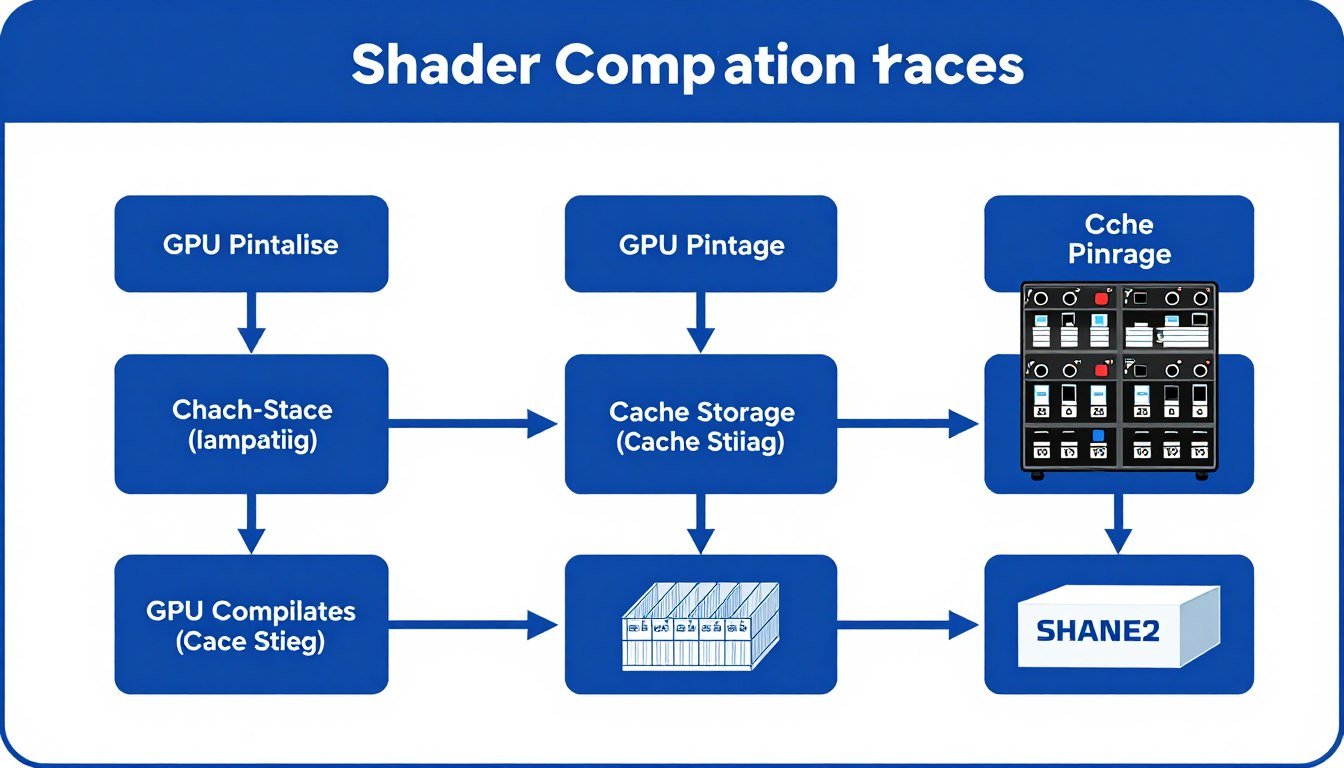
Shader cache is your GPU’s way of remembering work it’s already done. Think of shaders as small programs that tell your graphics card how to render specific visual effects. Every surface, shadow, reflection, and lighting effect needs shader instructions.
The problem starts when you launch a game for the first time. Your GPU has never seen these specific shader combinations before. It must compile them from scratch. This compilation process hammers your CPU and GPU simultaneously.
Modern games use thousands of shader variants. A single scene might require hundreds of compiled shaders. DirectX 12 and Vulkan made this worse by giving developers more control over the compilation process. Many games now compile shaders at runtime instead of shipping pre-compiled versions.
Real Talk: Game developers could pre-compile shaders for common GPU configurations. Many choose not to because it increases download sizes. You’re essentially doing their compilation work on your hardware.
When compilation happens during gameplay, you get stuttering. The game freezes for milliseconds while a new shader compiles. This creates the infamous “shader compilation stutter” that plagues modern PC gaming.
Your shader cache stores these compiled shaders to disk. The next time you launch the game, your GPU loads pre-compiled shaders from cache instead of recompiling from scratch. This is why second and subsequent launches feel dramatically smoother.
The cache size matters. NVIDIA defaults to 10GB. AMD uses unlimited cache by default. Intel’s Arc GPUs also use large cache sizes. If your cache fills up, old shaders get deleted. Then you’re back to compilation lag when those effects appear again.
When Shader Cache Helps
- Eliminates first-run stuttering on subsequent launches
- Reduces compilation load after driver updates
- Speeds up level loading in many games
- Prevents repeated compilation of identical effects
When Cache Causes Problems
- Corrupted cache files trigger crashes
- Old cache from previous driver versions conflicts
- Full cache directories slow down the system
- Wrong GPU cache gets loaded on multi-GPU systems
Understanding this background helps you make smart decisions about PC optimization. Your approach to shader cache management depends heavily on your specific GPU and the games you play.
Is Your Hardware Actually Causing These Shader Issues?
Before we dig into cache settings, let’s address something most guides ignore. Sometimes shader compilation lag points to a deeper hardware problem. Your CPU might be bottlenecking shader compilation. Or your GPU might lack the horsepower to compile complex modern shaders quickly.
Shader compilation is CPU-intensive. Games using DirectX 12 or Vulkan often max out several CPU threads during compilation. If you’re running an older quad-core processor, compilation takes longer. The game stutters more. Cache rebuilds feel endless.

I’ve seen this pattern repeatedly. Someone complains about shader stutter on Reddit. Their specs? An i5-9400F paired with an RTX 4070. That CPU struggles with modern shader compilation workloads. The GPU sits there waiting for the CPU to finish its compilation task.
Check If Your Hardware Is Balanced
Shader compilation issues often reveal deeper system imbalances. Test your CPU and GPU pairing to identify potential bottlenecks affecting compilation performance.
Graphics cards also vary in compilation speed. NVIDIA’s RTX 5090 with its Blackwell architecture compiles shaders faster than older Pascal or Turing GPUs. AMD’s RDNA 3 architecture handles compilation differently than RDNA 2. Intel’s Arc GPUs are still maturing their driver compilation efficiency.
Check your gaming performance metrics during compilation. If your CPU usage hits 100% on all cores while GPU usage stays low, that’s a CPU bottleneck. The opposite pattern suggests GPU limitations.
RAM also matters more than people realize. Shader compilation uses system memory aggressively. If you’re running 8GB of RAM, compilation might trigger memory swapping to disk. That adds even more stuttering on top of the compilation delay.
Understanding your system balance helps you set realistic expectations. No amount of cache management fixes fundamental hardware limitations.
Platform-Specific Fixes: NVIDIA, AMD, and Intel

Each GPU manufacturer handles shader cache differently. The settings live in different places. The optimal configurations vary. Here’s what actually works for each platform.
NVIDIA Shader Cache Management
NVIDIA Control Panel gives you direct access to shader cache settings. Open the Control Panel and navigate to “Manage 3D Settings.” Scroll down to find “Shader Cache Size.”
By default, NVIDIA limits cache to 10GB. This fills quickly if you play multiple modern games. Unreal Engine 5 games alone can eat several gigabytes per title. Increase this to “Unlimited” if you have spare drive space.
Location: NVIDIA cache lives in C:\ProgramData\NVIDIA Corporation\NV_Cache. This folder grows constantly. Check it periodically.
The “Shader Cache” option should stay “On” for most users. Turning it off forces recompilation every single launch. Only disable it when troubleshooting specific driver issues.
NVIDIA drivers also include shader pre-caching for some games. Steam’s shader pre-caching feature works alongside NVIDIA’s system. Enable both for best results.
If you’re experiencing crashes or corruption, manually delete the NV_Cache folder. Your games will rebuild cache on next launch. This process takes time but often fixes mysterious stuttering issues.
For more detailed NVIDIA optimization, check our complete NVIDIA settings guide.
AMD Shader Cache Settings
AMD Adrenalin software takes a different approach. Open AMD Software and go to Gaming → Graphics. Scroll to “Advanced” settings to find shader cache options.
AMD enables unlimited shader cache by default. The cache location is C:\Users\[YourName]\AppData\Local\AMD\DxCache for DirectX and C:\Users\[YourName]\AppData\Local\AMD\VkCache for Vulkan games.

AMD’s “Shader Cache” toggle should remain enabled. The software includes a “Reset Shader Cache” button for troubleshooting. Use this instead of manually deleting folders.
AMD introduced Smart Access Storage in recent drivers. This feature speeds up shader loading on compatible systems. Enable it if you’re using an AMD CPU with an AMD GPU.
One AMD-specific issue: driver updates sometimes corrupt cache. If you notice stuttering immediately after a driver update, reset your shader cache through AMD Software.
Learn more optimization tricks in our AMD Adrenalin guide.
Intel Arc Shader Cache
Intel Arc Control provides basic shader cache management. The interface resembles AMD’s approach more than NVIDIA’s.
Intel’s cache lives in C:\Users\[YourName]\AppData\Local\Intel\ShaderCache. The drivers handle cache sizing automatically. Manual control is limited compared to NVIDIA and AMD.
Intel focuses heavily on background shader compilation. The driver compiles shaders during game installation and after driver updates. This background processing reduces first-launch stuttering.
Arc GPUs are newer and driver maturity matters. Update your Intel graphics drivers regularly. Each update improves compilation efficiency and cache management.
If you’re running Arc in a new build, read our guide on building a mid-range PC for proper configuration.
Game-Specific Solutions That Actually Work
Beyond GPU driver settings, many games offer their own shader compilation options. Some work brilliantly. Others are marketing nonsense. Here’s what actually helps.
Steam Shader Pre-Caching
Steam added shader pre-caching in 2021. Enable it in Steam Settings → Downloads → “Allow background processing of Vulkan shaders.” This setting tells Steam to download and compile shaders before you launch the game.

The problem? Pre-caching only works for games that support it. Developers must provide the necessary shader data. Many games don’t bother. You’ll see a “Processing Vulkan Shaders” task in Steam’s download section for supported titles.
Let this background processing complete fully. Don’t launch the game while shaders are compiling. The process can take several minutes depending on the game and your hardware.
Unreal Engine 5 Games
UE5 titles like Fortnite and newer releases often include an “Install Shaders” option in graphics settings. This forces immediate compilation instead of runtime compilation.
Find this option and run it. Your game will freeze or show a progress bar for several minutes. This one-time pain eliminates stuttering during actual gameplay.
Some UE5 games compile shaders automatically on first launch. You’ll see a “Compiling Shaders” message with a percentage counter. Be patient. Interrupting this process causes problems later.
If you’re struggling with UE5 performance, our dedicated guide covers optimization beyond just shader issues.
DirectX 12 vs DirectX 11
Many games offer both DirectX 12 and DirectX 11 options. DX12 provides better performance potential but requires more shader compilation. DX11 uses simpler shaders with less aggressive compilation.
DirectX 12 Benefits
- Better CPU multi-threading
- Lower CPU overhead in ideal scenarios
- Access to newer graphics features
- Potential for higher frame rates
DirectX 12 Drawbacks
- More aggressive shader compilation
- Worse stuttering on first launch
- Larger shader cache requirements
- More prone to driver bugs
If shader stutter is unbearable, try switching to DX11 temporarily. You might sacrifice a few frames, but gameplay smoothness often improves dramatically.
PSO Cache in Specific Games
Pipeline State Objects (PSO) are a DirectX 12 and Vulkan concept. Some games create PSO caches separately from standard shader caches. These live in game directories rather than driver folders.
Examples include Cyberpunk 2077 and Horizon Zero Dawn. Check your game’s installation folder for files with “cache” or “PSO” in the name. Deleting these forces regeneration if you suspect corruption.
Game updates often invalidate old PSO caches. The game rebuilds them automatically, but this triggers compilation stuttering after patches. That’s normal. Give it one full playthrough to rebuild everything.
When to Clear Your Cache (And When Not To)

Cache clearing isn’t always the solution. Sometimes it makes things worse. Here’s when each option makes sense.
Clear Your Cache When
- You install a major GPU driver update
- Games crash immediately on launch with no error message
- Stuttering gets progressively worse over multiple play sessions
- You switch from one GPU to another (NVIDIA to AMD, etc.)
- Your cache folder exceeds 50GB with no performance benefit
- You’re troubleshooting mysterious graphics corruption
After clearing cache, expect longer load times on first launch. Every game needs to rebuild its compiled shaders. This is normal. Performance should improve after the initial compilation pass.
Keep Your Cache When
- Everything runs smoothly with no stuttering
- You only installed a minor driver hotfix update
- You’re troubleshooting non-graphics issues
- Your system has limited internet bandwidth (affects Steam pre-caching)
- You play competitive games where consistency matters
Cache maintenance is like defragging your hard drive. People used to do it obsessively. Modern systems handle it automatically most of the time.
Pro Tip: Create a monthly calendar reminder to check your cache folder size. If it’s growing out of control, that signals an underlying problem worth investigating.
Some users clear cache religiously after every driver update. This is overkill unless you’re experiencing specific problems. Modern GPU drivers coexist with existing caches reasonably well.
The exception is major architecture changes. When NVIDIA moved from Ampere to Ada Lovelace, cache clearing made sense. Similarly, AMD’s transition from RDNA 2 to RDNA 3 benefited from fresh caches.
If you’re dealing with persistent PC stuttering issues beyond just shaders, investigate other system optimizations.
Monitoring Tools: See What’s Actually Happening
Understanding shader compilation requires visibility into what your system is doing. Several tools reveal the hidden compilation process.
GPU-Z for Cache Activity
GPU-Z shows real-time GPU metrics including memory usage. During shader compilation, you’ll see memory usage spike as compiled shaders load into VRAM.

Download GPU-Z and keep it running during problem games. Watch the “Memory Used” graph during stuttering episodes. If memory usage shows regular spikes, that indicates ongoing compilation.
PresentMon for Frame Time Analysis
Frame time consistency matters more than average FPS. PresentMon captures detailed frame time data showing exactly when stuttering occurs.
Run PresentMon in the background during gameplay. The tool generates CSV files with microsecond-level frame timing data. Import this into Excel to create graphs. Shader compilation shows as sudden frame time spikes.
This data helps distinguish shader stutter from other performance issues. Regular periodic stuttering might indicate background tasks. Random spikes during new area loads suggest compilation.
CapFrameX for Detailed Analysis
CapFrameX provides a user-friendly interface for frame time analysis. It captures the same data as PresentMon but presents it in easier-to-read graphs.
The tool highlights frame time outliers automatically. You can compare runs before and after cache clearing. This quantifies whether your changes actually improved performance.
CapFrameX also includes a feature for comparing different hardware configurations. Useful when testing if your CPU or GPU causes compilation bottlenecks.
Task Manager’s GPU Tab
Windows Task Manager includes GPU monitoring. Press Ctrl+Shift+Esc and click the Performance tab. Select your GPU from the left sidebar.
During shader compilation, watch “3D” usage and “Compute” usage. Compilation typically shows high Compute usage while rendering (3D) stays lower. This pattern distinguishes compilation from normal gaming load.
The “Dedicated GPU Memory” graph shows memory allocation. Sudden jumps when entering new areas indicate shader loading from cache.
These monitoring tools transform guesswork into data-driven troubleshooting. You’ll know definitively whether shader compilation causes your performance problems.
How 2026 Hardware Changes the Shader Game
Recent hardware releases handle shader compilation differently than older generations. Understanding these changes helps optimize modern systems.

NVIDIA RTX 50-Series Improvements
NVIDIA’s RTX 5090 Blackwell architecture includes hardware-accelerated shader compilation units. These dedicated circuits compile shaders faster than older software-based approaches.
The RTX 5090 reduces first-launch compilation time by roughly 40% compared to RTX 4090. That “Compiling Shaders” progress bar moves noticeably faster.
Blackwell also improves cache efficiency. The architecture better predicts which shader variants a game needs, reducing unnecessary compilation.
AMD Ryzen 9800X3D CPU Impact
AMD’s Ryzen 9800X3D features 96MB of V-Cache. This massive L3 cache significantly speeds up shader compilation by reducing memory latency.
Compilation is CPU-intensive and memory-bound. The 9800X3D’s extra cache keeps compilation data closer to the CPU cores. Compilation completes faster with less system memory traffic.
Pairing a 9800X3D with an RTX 5090 creates a compilation powerhouse. You’ll still get first-run lag, but it’s measured in seconds rather than minutes.
DDR5 and Storage Speed Considerations
DDR5 memory bandwidth helps shader compilation more than most tasks. Compilation generates massive data streams between CPU, RAM, and GPU.
Fast NVMe storage also matters. Shader cache files load from disk frequently. A PCIe 5.0 SSD reduces cache loading times by 30-50% compared to SATA SSDs.
If you’re building a new system, prioritize these components for shader performance. Learn more in our build planning guide.
Windows 13 Gaming Optimizations
Windows 13 includes improved GPU scheduling and DirectX 12 Ultimate support. The OS better handles shader compilation priority, reducing impact on foreground tasks.
Enable Hardware-Accelerated GPU Scheduling in Windows Settings → Display → Graphics. This feature reduces compilation latency by letting the GPU manage its own workload priority.
Windows Game Mode also affects compilation. The mode prioritizes the active game’s compilation tasks over background applications.
The Bottom Line

Final Verdict: Shader compilation lag is fixable, but it requires understanding your specific GPU platform and game configuration. There’s no universal “fix shader stutter” button that works everywhere.
Here’s what actually matters. Enable shader pre-caching in Steam settings. Increase your NVIDIA cache size to unlimited or verify AMD’s unlimited cache is active. Let games complete their initial compilation pass without interruption. Monitor your system during stuttering to confirm shaders are the actual culprit.
Clear your cache only when experiencing specific problems – crashes, progressive stuttering, or after major driver architecture changes. Don’t obsessively clear cache after every minor update.
Modern hardware from 2026 handles compilation better than older systems. An RTX 5090 paired with a Ryzen 9800X3D reduces compilation time significantly compared to previous generation hardware. If you’re upgrading, these improvements deliver real quality-of-life benefits beyond just FPS numbers.
Verify Your System Is Properly Balanced
Shader compilation performance depends on both CPU and GPU working efficiently together. Test your component pairing to ensure your hardware isn’t creating unnecessary bottlenecks during compilation or gameplay.
The shader compilation problem won’t disappear entirely until game developers ship pre-compiled shaders or dramatically improve their compilation pipelines. Until then, proper cache management keeps your gaming experience smooth. You’ve now got the knowledge to handle shader issues across any GPU platform and any modern game.
Stop staring at compilation progress bars. Get back to actually playing games. Your optimized shader cache setup is waiting.