Your GPU just hit 95°C and your game stuttered for the third time this hour. The fans are screaming like a jet engine. You check the temps and see your hotspot reading 110°C while the average GPU temperature shows a “reasonable” 82°C. This temperature gap means one thing: your thermal paste has dried out and stopped doing its job.
I learned this the hard way two years ago. My RTX 3080 started throttling during demanding games. I ignored it for months, thinking better case airflow would fix everything. It didn’t. The performance kept dropping until I finally opened the card and saw paste that looked like crusty toothpaste. Five minutes of actual work later, my hotspot temps dropped 23°C.
This guide walks you through the complete GPU re-paste process. You’ll learn exactly which thermal paste actually works, what tools you need, how to disassemble your graphics card without breaking anything, and how to verify your results. I’m not going to pretend this is complicated rocket science, but I will show you the specific steps that prevent expensive mistakes.
Before you start taking things apart, check if thermal throttling is actually causing your performance issues. Sometimes the problem is somewhere else in your system.
Why Your GPU Hotspot Temperature Actually Matters
Most monitoring software shows you average GPU temperature. That number hides the real problem. Your graphics card has multiple temperature sensors, and the hotspot sensor sits on the part of the die that gets hottest. This spot typically runs 10-15°C hotter than the average reading.
When thermal paste degrades, this gap explodes. I’ve seen cards with 70°C average temps and 105°C hotspot readings. The GPU doesn’t care about averages. It throttles based on the hottest point.

Thermal throttling cuts your performance in two ways. First, the GPU reduces clock speeds to generate less heat. Second, it creates inconsistent frame times because the card keeps ramping clocks up and down. You get stuttering even when your average framerate looks fine.
Factory thermal paste typically lasts three to four years under normal use. Heavy gaming loads or poor case airflow can cut that time in half. Graphics cards from 2020 and earlier are hitting the point where paste degradation becomes common.
The Real Signs Your GPU Needs New Thermal Paste
Temperature numbers alone don’t tell the complete story. You need to look at patterns. Here’s what actually indicates dried thermal paste versus other problems.
Definite Re-paste Indicators
- Hotspot temps 25°C+ higher than average GPU temp
- Temps climbing steadily over weeks despite same workload
- Fan speed maxing out earlier than it used to
- Performance dropping in longer gaming sessions
- Card is three years old or older
Probably Something Else
- Sudden temp spikes (usually driver or power issue)
- High temps only in specific games (software problem)
- Temps fine but performance still bad (check system bottlenecks)
- Visible dust buildup on heatsink fins (clean first)
- Card under one year old (paste rarely fails this fast)
Run a stress test before you commit to opening your card. Use FurMark or Heaven Benchmark for twenty minutes. Monitor both average and hotspot temperatures. If the hotspot hits 100°C while average temp stays under 80°C, your paste is done.
Some cards just run hot by design. The RTX 4090 Founders Edition hits 85-90°C under full load because of its compact cooler. Check reviews of your specific card model to see what temperatures other people get. Your card running exactly like everyone else’s card means the paste is probably fine.

Which Thermal Paste Actually Works (And Which Is Overhyped)
The thermal paste market is full of nonsense marketing. Manufacturers claim their paste will drop temps by 15°C or last ten years. The reality is that any quality paste performs within 3-4°C of each other. The difference between good paste and great paste matters less than proper application technique.
I’ve re-pasted probably thirty graphics cards at this point. Here’s what I’ve learned about thermal paste that actually matters for GPU work.

Thermal Grizzly Kryonaut
This is what I use on my own cards. It handles GPU hotspot temperatures better than most pastes. The consistency makes it easy to spread evenly across the die. Temps typically drop 2-3°C compared to generic paste.
The downside is price. You’re paying premium for marginal gains. But it works reliably and the tube lasts for multiple applications.

Arctic MX-4
The best value option. Performance sits right between budget and premium pastes. It’s not conductive, which means less risk if you accidentally get some on other components. Easy to apply and widely available.
I recommend this for your first GPU re-paste. The price won’t make you nervous about wasting it while you learn proper application.

Noctua NT-H1
Noctua makes reliable hardware and their paste follows that pattern. Stable performance over time. The included application tools help with even spreading. Middle ground pricing between Arctic and Thermal Grizzly.
The consistency is slightly thicker than other pastes. This makes it harder to spread thin layers, but also means less risk of it seeping off the die edges.
Skip liquid metal unless you really know what you’re doing. Yes, it performs better than traditional paste. It also conducts electricity, corrodes aluminum, and becomes nearly impossible to remove if you make mistakes. The 4-5°C improvement isn’t worth the risk for most people.
Avoid paste that comes in syringes smaller than 1g. You need enough material to fully cover the GPU die with room for error. Pre-applied paste from the factory often dries into uneven patterns, so you’ll use more new paste than you expect.
Everything You Need Before Opening Your Graphics Card
Getting the right tools makes this job easier and safer. You don’t need specialized equipment, but having proper materials prevents damage to expensive components.

Essential Tools
These items are mandatory. Don’t skip any of them.
- Precision screwdriver set (Phillips #0 and #1 sizes minimum)
- Isopropyl alcohol (90% concentration or higher)
- Lint-free cloths or coffee filters
- Thermal paste (one of the options mentioned above)
Highly Recommended
These make the job cleaner and reduce risk.
- Anti-static wrist strap (prevents component damage)
- Plastic prying tool or old credit card (for stubborn cooler removal)
- Small containers for organizing screws
- Good lighting (desk lamp or headlamp)
Nice to Have
Optional items that improve the experience.
- Thermal paste spreader (small plastic card works fine)
- Magnifying glass for small component inspection
- Compressed air for cleaning while card is open
- Phone camera for reference photos during disassembly
What NOT to Use
These will damage your card or make cleanup harder.
- Regular rubbing alcohol (leaves residue)
- Paper towels (leave lint on die surface)
- Metal tools for prying (scratches PCB and components)
- Excessive force (you’ll crack something important)
Buy isopropyl alcohol from a pharmacy or electronics store. The 70% stuff from the first-aid section works, but higher concentration evaporates faster and leaves less residue. I use 99% when I can find it.
Make sure you have a clean workspace. A kitchen table works fine if you put down a clean towel first. Avoid carpet because of static electricity risk. Ground yourself by touching a metal part of your PC case before handling components.
Not Sure If Your GPU Is The Problem?
Before you disassemble your graphics card, verify that thermal issues are actually causing your performance problems. Our bottleneck calculator helps identify whether your GPU, CPU, or other components are limiting your system.
Taking Apart Your Graphics Card Without Breaking Anything
This part makes people nervous. Graphics cards look complicated, but they disassemble in a logical sequence. Follow these steps carefully and you’ll be fine.
First, remove the card from your computer. Shut down completely, switch off the PSU, and press the power button a few times to drain residual charge. Unplug all power cables from the GPU. Unscrew the bracket from your case. Press the PCIe slot release lever and pull the card straight out.

Lay the card on your clean workspace with the cooler facing up. Take a photo with your phone before you remove anything. This reference image helps during reassembly when you forget where cables connected.
Remove The Backplate and Cooler Shroud
Start with the backplate screws. Most cards use small Phillips screws around the PCB edges. Some manufacturers hide screws under warranty stickers. Removing these voids your warranty, but cards older than three years are usually out of warranty anyway.
Keep track of screw lengths. Different positions often use different screw sizes. I use a piece of cardboard with labeled holes to organize screws by location. This seems excessive until you’re reassembling and can’t remember which screw goes where.
The plastic cooler shroud usually clips or screws onto the heatsink assembly. Remove any visible screws, then gently work the shroud away from the fans. Don’t force it. If something won’t move, you missed a screw or clip.
Disconnect Power Cables
Most modern cards have a small cable connecting the PCB to the fan assembly. This connector is fragile. Pull straight up on the connector housing, not the wires. Take another photo showing the cable orientation before disconnecting anything.

Remove Heatsink Mounting Screws
Now you reach the critical screws holding the heatsink to the GPU die. These typically use spring-loaded screws around the GPU area. Loosen them gradually in a diagonal pattern. Don’t fully remove one screw before touching the others. This prevents uneven pressure that could crack the die.
Some cards use a retention bracket over the GPU die area. This piece usually has its own set of tiny screws. Remove these first, then proceed to the main heatsink screws.
Separate The Heatsink
With all screws removed, the heatsink should lift away from the PCB. Don’t force it. Dried thermal paste creates a seal between the heatsink and die. Gently twist the heatsink back and forth to break this seal. If it still won’t budge, use a plastic tool to carefully separate the heatsink from the die edges.
The heatsink will likely have thermal pads stuck to it where it contacts VRAM chips and power components. These pads are reusable unless they’re torn or compressed to paper thickness. Keep them stuck to the heatsink for now.

You’re now looking at the GPU die with old thermal paste caked on it. Don’t touch the die surface with your fingers. Skin oils interfere with thermal transfer.
Cleaning Old Paste and Applying New Thermal Material
The cleaning step matters more than most people think. Leftover paste residue creates air gaps that hurt thermal performance. This part requires patience, not strength.
Remove Old Thermal Paste
Fold a lint-free cloth into a small pad. Pour a bit of isopropyl alcohol onto the cloth until it’s damp but not dripping. Wipe the GPU die surface in one direction. Don’t scrub in circles. You want to push old paste off the die, not spread it around.
The first wipe removes most of the dried paste. Check the cloth and you’ll see it picked up a grayish residue. Flip to a clean section of cloth, add more alcohol, and wipe again. Repeat until the cloth comes away clean.

Clean the heatsink contact surface the same way. The heatsink surface is usually larger than the die, so you might need more cloth and alcohol. Make sure to remove paste from the edges where it squeezed out during the original installation.
Let both surfaces air dry for two minutes. Isopropyl alcohol evaporates quickly, but you want to be certain. A tiny bit of remaining alcohol won’t hurt anything, but visible liquid can dilute your new paste.
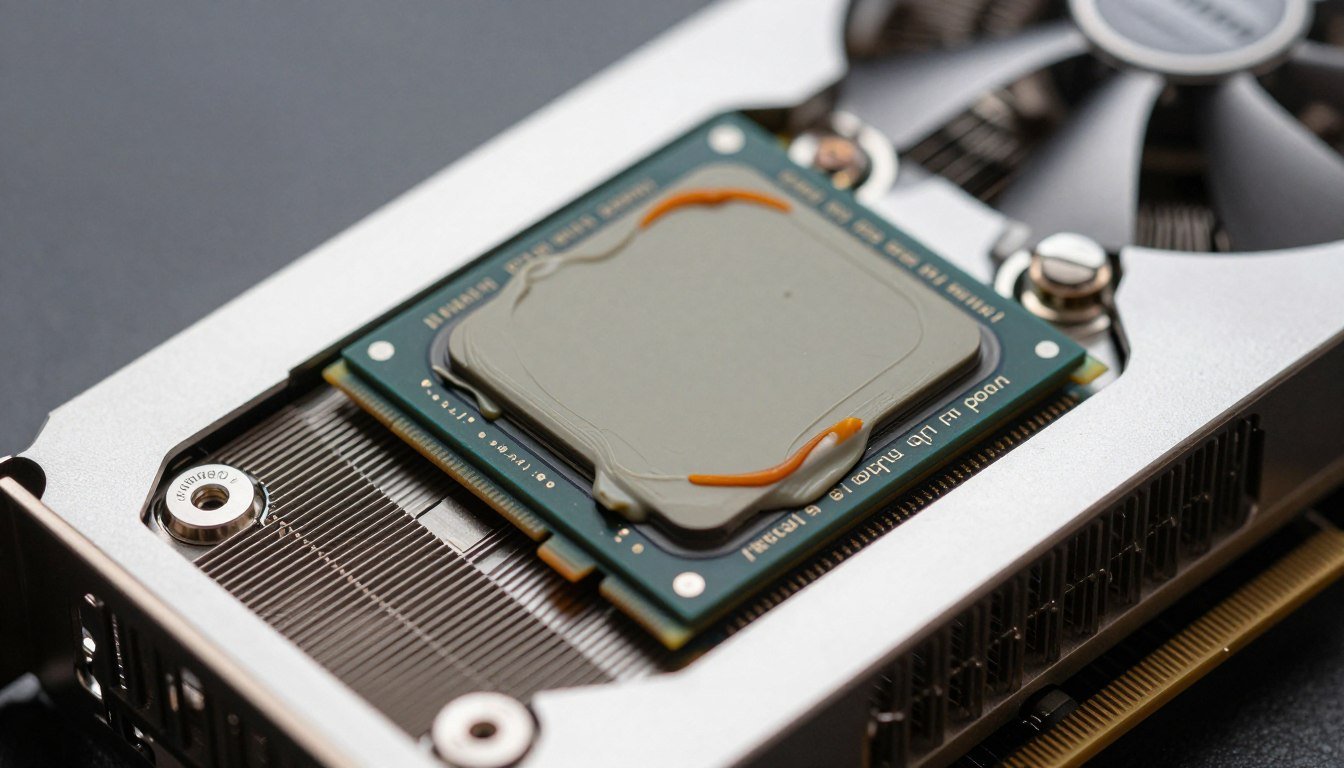
Apply New Thermal Paste
This is where people overthink things. The goal is simple: create a thin, even layer of paste that fills microscopic gaps between the die and heatsink. Too much paste acts as an insulator. Too little paste leaves air gaps.
I use the spread method for GPU dies. Put a rice-grain-sized dot of paste in the center of the die. Use a plastic spreader or clean plastic card to spread it in a thin, even layer across the entire die surface. You should be able to see the die texture through the paste.

Some people prefer the dot method where you put a small amount in the center and let heatsink pressure spread it. This works fine for CPUs with large integrated heat spreaders. GPU dies are smaller and irregular shapes. Spreading manually gives better coverage.
For the small chips around the GPU (VRAM and power components), check if your heatsink had thermal pads touching them. If the pads look good, reuse them. If they’re torn or compressed flat, you need new pads. Don’t replace thermal pads with paste – they serve different purposes.
You can find replacement thermal pads online, but make sure you get the right thickness. Measure the old pads with calipers if possible. Using too-thick pads prevents the heatsink from making proper contact with the GPU die.
Reassembly
Carefully line up the heatsink over the PCB. The mounting holes should align perfectly. Don’t slide the heatsink around once it touches the paste. This creates air bubbles and uneven coverage.
Install the spring-loaded screws using the same diagonal pattern you used for removal. Tighten them gradually and evenly. The springs should compress about halfway. Over-tightening can crack the die or PCB. Under-tightening leaves gaps in thermal contact.

Reconnect the fan power cable. Check your reference photo to confirm correct orientation. Install the cooler shroud and backplate using the screws you organized earlier. Everything should fit together easily. If you have to force something, stop and figure out what’s wrong.
Before putting the card back in your PC, do a visual inspection. Make sure all screws are installed, no cables are pinched, and the fans spin freely when you rotate them by hand.
Testing Your Results and What Temperature Drop To Expect
Install the graphics card back in your system. Connect power cables and display output. Boot up and install GPU monitoring software if you don’t have it already. HWiNFO64 shows both average and hotspot temperatures, which is what you need to verify your work.
Let the system idle for five minutes to establish baseline temperatures. Then run the same stress test you used before re-pasting. This gives you direct comparison data.

Realistic expectations matter here. You’re not going to see 30°C temperature drops unless something was seriously wrong before. Normal results from a successful re-paste:
- Average GPU temp drops 5-8°C under load
- Hotspot temp drops 10-15°C under load
- Hotspot delta (difference from average) decreases to 15-20°C
- Fan speeds run 10-20% lower for same workload
- No thermal throttling during extended stress tests
If your temperatures didn’t improve or got worse, something went wrong. Common problems include using too much paste, not fully seating the heatsink, or damaged thermal pads. You’ll need to open the card again and check your work.
Run monitoring during actual gaming sessions for a few hours. Stress tests create worst-case scenarios. Real-world gaming loads often behave differently. Check that temperatures stay stable during longer sessions and that you’re not seeing thermal throttling.
Better thermal performance often translates to improved gaming experience. Lower temperatures mean the GPU sustains higher boost clocks. This doesn’t show up as huge framerate increases, but you should notice more consistent frame times and less stuttering. Our guide on fixing PC stuttering and frame time consistency covers other factors that affect smoothness.
Verify Your GPU Performance
Now that you’ve improved your thermal performance, check if your GPU is properly balanced with the rest of your system. Thermal issues often mask other bottlenecks that prevent you from getting maximum performance.
Common Mistakes That Waste Your Time and Thermal Paste
I’ve watched a lot of people re-paste GPUs incorrectly. Here are the mistakes that keep showing up, and how to avoid them.
Using Way Too Much Paste
More paste doesn’t mean better cooling. Excess paste gets squeezed out the sides and creates a thick layer that insulates rather than conducts. The correct amount covers the die in a layer thin enough to see the die surface texture through it.
I’ve seen people use half a tube on a single GPU die. This wastes expensive paste and makes cleanup harder during your next re-paste. One small rice grain of paste should cover a typical GPU die.


Forgetting About Thermal Pads
The GPU die isn’t the only component that needs thermal management. VRAM chips and power delivery components use thermal pads to transfer heat to the heatsink. Damaged or missing pads cause those components to overheat even when the GPU die runs cool.
Check all thermal pad locations before reassembly. If a pad looks compressed to paper thickness or tore during disassembly, replace it. Don’t substitute paste for pads – they’re designed for different gap sizes and pressure requirements.
Tightening Screws Unevenly
GPU dies are fragile silicon chips. Uneven mounting pressure can crack them or create air gaps in thermal contact. Always tighten spring-loaded screws in a diagonal pattern, a little bit at a time. The proper sequence is: slightly tighten opposite corners, then move to the other diagonal, repeat until all springs compress evenly.
Not Grounding Yourself
Static electricity can damage sensitive GPU components even if you don’t see a visible spark. Touch a grounded metal object before handling the card. Better yet, use an anti-static wrist strap connected to your PC case. This seems paranoid until you brick a $800 graphics card with an invisible static discharge.
Rushing The Cleaning Process
Leftover residue from old paste or using the wrong cleaning solution creates problems. Paper towels leave lint on the die. Low-concentration alcohol leaves residue. Take time to properly clean both surfaces until they’re spotless. The extra three minutes you spend cleaning makes a bigger temperature difference than switching between premium thermal paste brands.

Skipping The Test Run
Some people reassemble everything, install the card, and close up their PC case before testing. Then temperatures are worse than before and they have to disassemble everything again. Test the card outside the case first. Run monitoring software and verify temperatures improved before you button everything back up.
How Often You Actually Need To Re-paste Your GPU
The question everyone asks after their first successful re-paste: how long until I have to do this again? The answer depends on several factors, but there’s a general pattern that holds true across most graphics cards.
Quality thermal paste typically maintains good performance for three to five years under normal use conditions. Heavy gaming loads can reduce this to two or three years. Cards that run hot by design (compact coolers, high power limits) stress their thermal paste more than cards with robust cooling solutions.

You don’t need to re-paste on a schedule. Monitor your temperatures instead. When you notice hotspot temps creeping up by 10-15°C compared to when the card was new, that’s your signal to plan a re-paste. Modern GPUs from 2020 and earlier are reaching the age where paste degradation becomes common.
Environmental factors matter too. Hot climates stress thermal paste faster than cool environments. Poor case airflow forces your GPU to run hotter, which accelerates paste degradation. Dust buildup on heatsink fins reduces cooling efficiency and can mask paste problems until temperatures get really bad.
Some manufacturers use better thermal paste than others. EVGA and Sapphire cards typically use quality paste that lasts longer. Budget cards sometimes use cheap paste that dries out faster. The only way to know is monitoring your specific card over time.
Between re-pastes, maintain good case airflow and clean dust from heatsink fins every six months. Compressed air works fine for external cleaning. This simple maintenance extends the life of your thermal paste and keeps temperatures stable. For more tips on optimizing overall system performance, check our complete PC optimization guides.
When You Shouldn’t Re-paste Your GPU
Re-pasting isn’t always the right solution. Sometimes other fixes work better, or the risk outweighs the benefit.
Cards still under warranty should not be opened. Removing warranty stickers voids coverage, and if something else fails, you’ve lost your RMA option. For cards under two years old, contact the manufacturer first. Many will service thermal issues under warranty.
If your card has known cooling design flaws, re-pasting won’t fix the fundamental problem. The RTX 3080 and RTX 3090 Founders Editions have inadequate VRAM cooling regardless of paste quality. Better paste helps, but real improvement requires upgraded thermal pads or modified cooling solutions.

Extremely high-end cards like the RTX 5090 use complex cooling solutions with multiple thermal pads, precise mounting pressure, and sometimes liquid cooling integration. The risk of damaging these cards during re-paste increases significantly. Unless you have experience with complex cards, professional service might be worth the cost.
Budget cards under $300 present an economic question. If your card is four years old and re-pasting gives you another year of life, the time investment makes sense. But if the card is already struggling with modern games due to age, spending that time researching better upgrade options might be more productive.
Consider your comfort level with hardware work. If the thought of opening your graphics card makes you anxious, the stress isn’t worth the 10°C temperature improvement. Some computer shops offer re-paste services for $50-75. This costs more than DIY, but provides peace of mind if you’re nervous about the process.
The Bottom Line
Re-pasting a GPU is straightforward maintenance that most PC builders can handle. The process takes 30-60 minutes depending on card complexity. You’ll need basic tools, quality thermal paste, and patience during cleaning and reassembly.
Expect realistic results. A successful re-paste drops average temperatures by 5-8°C and hotspot temps by 10-15°C. This eliminates thermal throttling and reduces fan noise. You won’t suddenly gain 30% more framerate, but you will get more consistent performance and extended hardware lifespan.
The biggest risks come from rushing the process or using excessive force. Take photos during disassembly. Organize your screws. Clean surfaces thoroughly. Tighten mounting screws gradually in diagonal patterns. These simple habits prevent the mistakes that damage expensive graphics cards.
Most cards need re-pasting every three to five years. Monitor your temperatures instead of following a fixed schedule. When hotspot temps climb significantly higher than when your card was new, it’s time to plan a re-paste session.

For cards still under warranty, contact the manufacturer before opening anything. For budget cards nearing end of life, consider if upgrade makes more sense than maintenance. And if you’re nervous about the process, professional re-paste services exist.
The thermal paste you choose matters less than proper application technique. Any quality paste from Arctic, Noctua, or Thermal Grizzly will perform within a few degrees of each other. Focus on thorough cleaning and even spreading rather than chasing marginal paste performance differences.
Understanding your system’s overall balance helps contextualize thermal improvements. Better GPU temperatures complement other optimizations like proper case airflow, balanced component selection, and driver settings. Our bottleneck calculator helps identify whether thermal issues are your primary performance limitation or if other components need attention first.
Re-pasting your GPU gives you direct control over one of the most common aging issues in gaming PCs. The skill transfers to other hardware maintenance tasks. Once you’ve successfully re-pasted a graphics card, cleaning CPU coolers or replacing case fans feels less intimidating. This practical hardware experience builds confidence for future upgrades and repairs.