You’re three rounds into a ranked match. Everything’s smooth. Then suddenly your FPS tanks from 144 to 60. Your GPU fans sound like a jet engine taking off. But here’s the weird part: your usage stats show the card isn’t even hitting 100%. Welcome to the world of thermal bottleneck.
This guide will show you exactly why your hardware chokes under heat. You’ll learn how to spot the signs before they wreck your game. And I’ll walk you through the fixes that actually work, not the Reddit myths.
I spent two years blaming my “weak CPU” for frame drops. Turns out my case had the airflow of a sealed coffin. One afternoon of thermal testing changed everything. That’s the kind of specific, tested advice you’ll get here.
Before we dig into the technical stuff, you might want to check your system balance to see if thermal issues are even your main problem. Sometimes the bottleneck is somewhere else entirely.
What Actually Happens When Your PC Gets Too Hot
A thermal bottleneck is when your hardware slows itself down to avoid heat damage. Think of it like your car’s engine cutting power when it overheats. The system isn’t broken, it’s protecting itself.
Your CPU and GPU have built-in temperature limits. When the junction temperature hits around 90-100°C (depending on the chip), the processor reduces its clock speed. This is called thermal throttling. Less speed means less power draw, which means less heat generation.

The problem? You paid for a GPU that boosts to 2.5 GHz. But thermal resistance forces it to run at 1.8 GHz instead. That’s a massive performance drop. Your expensive hardware is literally being held back by physics.
The Chain Reaction of Heat Flow Problems
Heat doesn’t just appear and disappear. It follows a path through your system. Every step in that path has resistance to heat transfer. When one part of the chain fails, everything backs up.
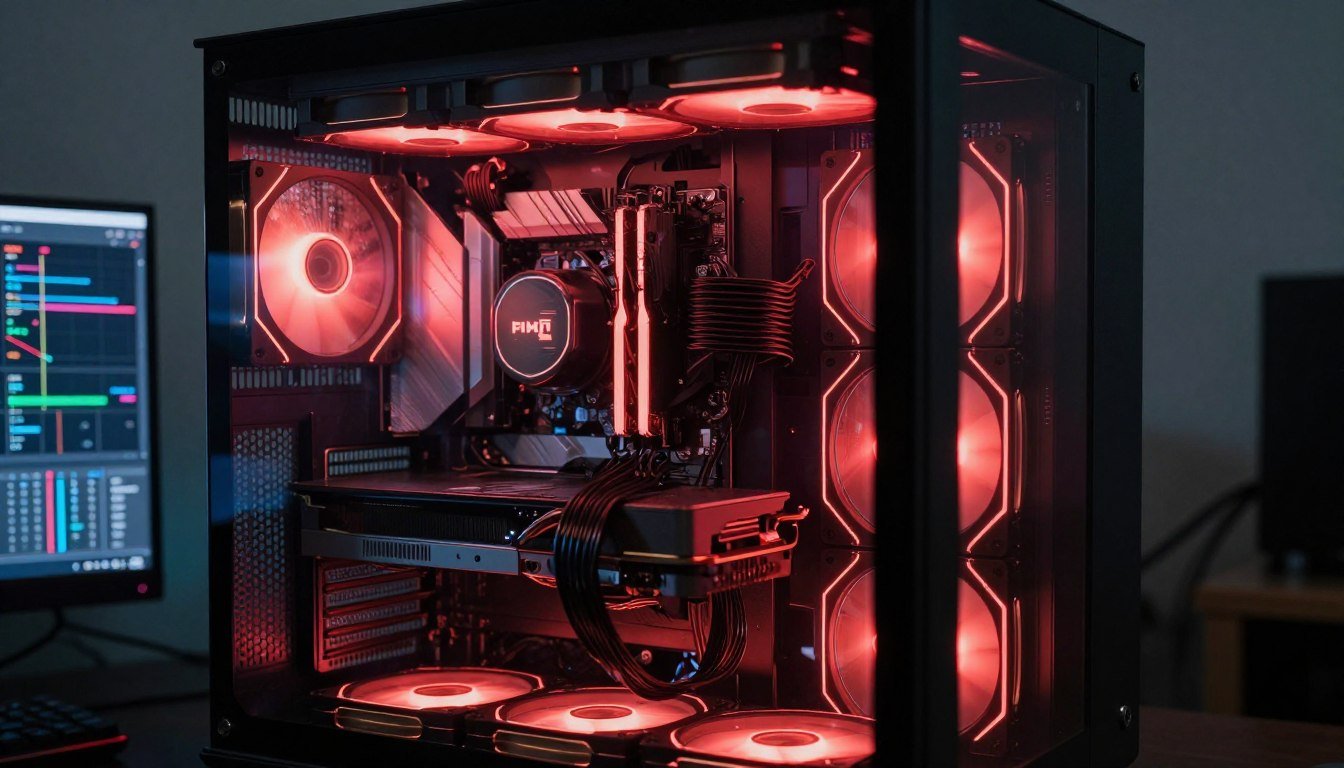
Here’s the flow: Your GPU die generates heat. Thermal paste conducts it to the cooler. The heatsink spreads it across metal fins. Fans push air across those fins. Case airflow removes the hot air. Each step has thermal resistance fighting against heat flow.
Common Heat Transfer Bottlenecks
- Dried thermal paste creating an insulation layer between chip and cooler
- Dust blocking heatsink fins and reducing surface area for convection
- Stock cooler with insufficient contact area for high TDP chips
- Poor case airflow creating hot air pockets around components
- Cramped GPU spacing choking natural convection between cards
The temperature gradient from your GPU junction to ambient room air determines how fast heat escapes. If room temperature is 25°C and your GPU is at 95°C, that’s a 70°C gradient. More gradient equals better heat flow, but only if the thermal conductivity of your cooling materials allows it.
This is why the same GPU runs hotter in summer. The ambient temperature rises, the gradient shrinks, and heat flow slows down. Same power consumption, worse cooling results.
Why Modern Hardware Makes This Worse
The RTX 5090 pulls 450W. The Ryzen 9950X can spike to 200W on a single chip. We’re cramming more power into the same physical space every generation. The laws of thermodynamics haven’t changed to keep up.
Higher power density means more heat concentration. Your GPU die might be smaller than a postage stamp, but it’s trying to dissipate heat equivalent to four old-school light bulbs. That heat has to go somewhere, and it has to go fast.
Real Talk: If you’re running cutting-edge hardware from 2026, your thermal design can’t be from 2020. The materials, airflow patterns, and cooling capacity need to match the power levels. Otherwise, you’re setting up a thermal bottleneck from day one.
Understanding system balance means more than just matching CPU and GPU performance tiers. Thermal capacity is part of that balance equation.
How to Spot a Thermal Bottleneck Before It Kills Your Game
Frame drops are the obvious sign. But thermal bottlenecks have specific patterns that separate them from other performance issues. Here’s how to actually diagnose what’s happening.

The Temperature-Performance Connection
Open HWiNFO64 or MSI Afterburner. Play your most demanding game for 20 minutes. Watch two specific numbers: junction temperature and clock speed. If temperature climbs and clock speed drops at the same time, that’s thermal throttling in action.
Here’s what the data looks like for different scenarios:
| Scenario | GPU Temp | Clock Speed | FPS Behavior | Diagnosis |
| Normal Operation | 70-80°C steady | Boost maintained | Consistent | No bottleneck |
| Thermal Throttle | 90-100°C rising | Drops 15-30% | Gradual decline | Thermal bottleneck |
| Power Limit | 75-85°C steady | Fluctuates | Stutters | PSU/power issue |
| CPU Bottleneck | 60-70°C low | Underutilized | Capped low | CPU limiting GPU |
The time factor matters too. If performance drops after 10-15 minutes of gaming but starts fine, heat is building up faster than your cooling can remove it. That’s a clear thermal bottleneck pattern.
Testing Your Actual Thermal Limits
Run a stress test to find your system’s breaking point. I use FurMark for GPU and Prime95 for CPU. These push your hardware harder than any game will.
Watch what temperature your components stabilize at under full load. If your GPU settles at 95°C and starts throttling, you’ve found your thermal ceiling. Anything you do to improve cooling will lower that ceiling and reduce throttling.
Signs It’s Definitely Thermal
- Performance degrades over time in a session
- Problem is worse in summer or hot rooms
- Opening case panel improves performance
- Temps hit 90°C+ before frame drops start
- Clock speeds bounce around constantly under load
- VRM temperatures exceeding 100°C
Signs It’s Probably Not Thermal
- Instant performance drop when loading a game
- Problem occurs even in cool conditions
- Temperatures stay under 80°C during drops
- Clock speeds stay stable despite FPS issues
- Performance identical whether GPU is cold or hot
- Other hardware changes fix the issue completely
If you’re seeing inconsistent performance but temperatures look fine, you might be dealing with a CPU bottleneck instead. Different problem, different solution.
Not Sure What’s Actually Bottlenecking Your System?
Temperature is just one factor. CPU, GPU, RAM, and resolution all interact in complex ways. Our bottleneck calculator helps you identify the real weak point in your setup before you waste money on the wrong upgrade.
The Thermal Paste Mistake Almost Everyone Makes
I thought thermal paste lasted forever. Five years into my build, I finally repasted my GPU. Temperatures dropped by 18°C. That dried-out paste was creating a thermal resistance barrier between my GPU die and the heatsink.

How Thermal Paste Actually Works
Even the flattest metal surface has microscopic gaps and ridges. When you mount a cooler to a chip, those tiny imperfections create air pockets. Air is an insulator. Those pockets block heat transfer.
Thermal paste fills the gaps. It’s not meant to be a thick layer between surfaces. It’s gap filler. The ideal application is as thin as possible while still covering every microscopic valley in both contact surfaces.
The thermal conductivity of paste matters, but contact area matters more. A cheap paste applied correctly beats expensive paste applied wrong. The goal is metal-to-metal contact with paste only in the gaps.
When to Actually Replace Your Paste
Thermal paste degrades over time. Heat cycles, oxidation, and pump-out (paste getting squeezed away from contact area) all reduce effectiveness. Here’s the realistic timeline:
- High-quality paste: 3-5 years before replacement needed
- Budget paste: 2-3 years maximum
- Liquid metal: 5+ years if applied correctly
- Pre-applied OEM paste: Replace at first sign of thermal issues
Standard Timeline
- Systems running hot constantly (crypto mining, rendering)
- Frequent thermal cycling (powering on/off multiple times daily)
- Poorly secured cooler allowing movement
- Budget paste in high-heat applications
Accelerated Degradation
- Temperatures suddenly jumped 10°C+ with no other changes
- Paste is visibly dried or cracked when inspected
- Cooler was removed for any reason
- System is 4+ years old and never repasted
Replace Immediately If
Application Technique That Actually Matters
The internet fights over dots versus lines versus spreads. Here’s what actually matters: complete die coverage with minimal excess. Any method that achieves that works fine.
For CPUs, a rice-grain sized dot in the center spreads when the cooler mounts. For GPUs with rectangular dies, a thin line across the length works better. The mounting pressure does the spreading.
Critical Detail: Tightening pattern matters more than paste pattern. Tighten cooler screws in an X pattern (diagonal corners), alternating sides, gradually increasing pressure. This ensures even contact and prevents paste squeeze-out to one side.
After repasting, run a stress test and watch temperatures stabilize. If they’re still hitting thermal limits, the problem is elsewhere in your heat transfer chain.
Why Your Expensive Cooler Can’t Beat Bad Airflow
I installed a 360mm AIO on my CPU. Temps barely changed. Then I added two cheap intake fans to my case front. CPU temps dropped 12°C. The expensive cooler was just recycling hot air trapped inside the case.

The Physics of Case Thermals
Your cooler dumps heat into the air inside your case. That hot air has to leave, or it just accumulates. When case interior temperature rises, the temperature gradient between your components and the surrounding air shrinks. Heat flow slows down. Thermal bottleneck forms.
Ambient air temperature inside a poorly ventilated case can be 15-20°C higher than room temperature. Your GPU is trying to cool itself against 40°C air instead of 22°C air. That’s a massive handicap.
Intake vs Exhaust Balance
Positive pressure (more intake than exhaust) keeps dust out but can trap hot air. Negative pressure (more exhaust than intake) pulls air through every gap but sucks in dust. Neither extreme is ideal.
The reality is you need both. Fresh air coming in the front and bottom. Hot air leaving through rear and top. The natural convection of heat rising actually helps if you let it.
Effective Airflow Setup
- 2-3 intake fans at case front pulling cool air in
- 1-2 exhaust fans at rear pushing hot air out
- Top exhaust optional for very hot builds
- GPU positioned where intake air hits it directly
- No obstructions blocking front intake grille
- Positive pressure slight advantage (more intake CFM)

The Cable Management Factor Nobody Mentions
Cables act like dams in your airflow path. A rat’s nest of power cables behind the motherboard tray doesn’t matter. But cables stretched across the case interior directly in the airflow path create resistance and turbulence.
Route cables along case edges. Use the cable management channels built into your case. Keep the main airflow path from front intake to rear exhaust as clear as possible. It’s not about aesthetics, it’s about reducing airflow resistance.
Common Mistake: Mounting an AIO radiator as front intake seems logical (cool air for CPU). But now your GPU is breathing the hot air that passed through the radiator. In high-power systems, top-mount the AIO as exhaust and use front fans for fresh case air. Your GPU will thank you.
If you’re building a new system or upgrading, planning case airflow should happen before you pick components. The best hardware still needs good cooling design.
Fan Curves: The Free Performance Fix You’re Ignoring
Default fan curves are timid. They prioritize silence over cooling. Your GPU hits 85°C before the fans spin up to 70%. By then, thermal throttling already started.

How Aggressive Should Your Curve Be?
There’s a balance between noise and thermal headroom. I run my GPU fans at 40% minimum when gaming, ramping to 70% at 75°C, and 100% if it somehow hits 85°C. That prevents thermal throttling while keeping noise reasonable.
The key is ramping up earlier, not later. By the time default curves react to high temperatures, you’ve already lost performance. Prevention beats reaction.
Setting Custom Curves That Work
Use MSI Afterburner for GPUs and BIOS settings or fan control software for case fans. Test your curve by running a stress test and watching temperature stabilization.
The goal is maintaining consistent temperatures, not perfect silence. Thermal throttling destroys more performance than fan noise destroys your experience.
Case Fan Synchronization
Your case fans should respond to system temperature, not just CPU or GPU individually. Some motherboards support “system temperature” profiles that consider multiple sensors.
If your motherboard doesn’t support this, set case fans to respond to the hottest component (usually GPU in gaming systems). When the GPU heats up, case fans should increase to help dissipate that heat.
Learn More About Performance Optimization
Fan curves are just one part of system tuning. We’ve got detailed guides on PC optimization techniques that cover everything from BIOS settings to software tweaks.
Undervolting: Less Power, Better Thermals, Same Performance
This sounds backwards. Lower voltage equals worse performance, right? Wrong. Modern GPUs and CPUs are overvolted from the factory. They run higher voltage than needed for their rated speeds because it guarantees stability across all chips.

Why Undervolting Actually Works
Power consumption scales exponentially with voltage. A small voltage reduction creates a large power drop. Less power means less heat generation. Less heat means less thermal resistance fighting your cooling. Your temperatures drop while maintaining the same clock speeds.
I undervolted my RTX 5080 from 1.05V to 0.925V at the same 2.5 GHz boost clock. Power draw dropped 60W. Temps fell from 86°C to 74°C. FPS stayed identical. That’s a thermal bottleneck fix with zero downside.
The Safe Undervolting Process
Use MSI Afterburner (GPU) or Ryzen Master/Intel XTU (CPU). The process is testing and validation, not blind guessing.
Step 1: Baseline Testing
Run stress tests at stock settings. Record stable boost clocks, temperatures, and power draw. This is your baseline for comparison.
Step 2: Gradual Reduction
Lower voltage in small increments (0.025V for GPUs, 0.05V for CPUs). Test stability after each change. Watch for crashes or artifacts.
Step 3: Validation
Once you find the lowest stable voltage, run extended stress tests (30+ minutes). Confirm temps dropped and clocks stayed stable.
Realistic Undervolt Results
Don’t expect miracles. Typical results:
- GPUs: 0.05-0.15V reduction, 10-20°C temperature drop, 40-80W power savings
- CPUs: 0.05-0.10V reduction, 8-15°C temperature drop, 20-40W power savings
- Performance impact: 0-2% in most cases (within margin of error)
- Stability requirement: Must pass 30+ minute stress tests without crashes
Every chip is different. Silicon lottery applies. Some chips undervolt beautifully, others barely budge. Test and validate your specific hardware.
Reality Check: Undervolting won’t save a terrible cooling setup. But it can push a borderline thermal situation into acceptable range. It’s a free tool that costs nothing but time to test. Try it before spending money on new coolers.
If you’re interested in how voltage and clocks interact with overall system performance, check out our guide on CPU core scaling. The principles apply to thermal management too.
How 2026 Hardware Changed the Thermal Game
The RTX 5090 and Ryzen 9950X are beasts. They’re also thermal nightmares if you’re not prepared. The power density on these chips is absurd compared to previous generations.

RTX 5090 Blackwell: The 450W Monster
This card is a space heater. The reference design pulls 450W under full load. That’s more power than most CPUs. But NVIDIA learned from the 4090 cable-melting disaster. The thermal design on the 5090 is actually impressive if you let it work.
The vapor chamber spreads heat across a massive surface area. The three-fan design moves serious airflow. But it needs case support. If your case chokes the GPU intake, you’ll hit thermal limits no matter how good the cooler is.
RTX 5090 Thermal Management Tips
- Case needs unrestricted front intake directly feeding GPU fans
- Consider vertical GPU mount if case supports it (better airflow access)
- Monitor junction temperature, not just GPU temp (hotspot matters)
- Expect 80-85°C under sustained load as normal (thermal limit is 90°C+)
- Undervolting can save 60-80W with zero performance loss
- Power supply needs 1000W+ for system stability
Blackwell Specific Issue: The 5090 has aggressive boost behavior. It will push clocks until it hits temperature or power limits. If case airflow is marginal, you’ll see constant clock fluctuation as it bounces off thermal ceiling. Fix the airflow, stabilize the clocks.
For a deep look into maximizing 5090 performance, we’ve got a comprehensive guide on RTX 5090 optimization for gaming and AI workloads.
Ryzen 9950X: The Hot Spot Problem
AMD’s newest flagship runs hot. Not because it’s inefficient, but because they crammed 16 cores into a tiny die area. The heat density creates “hot spots” – localized areas significantly hotter than the average CPU temperature.
Your monitoring software might show 78°C average CPU temp. But one chiplet could be hitting 95°C and throttling. This is why thermal paste application matters so much on these chips. Uneven coverage leaves hot spots unsupported.
Ryzen 9000 Cooling Requirements
- Minimum: 240mm AIO or high-end air cooler (6+ heat pipes)
- Recommended: 280mm or 360mm AIO for sustained workloads
- Mount pressure critical – follow manual torque specs exactly
- Thermal paste must cover entire IHS with no gaps
- PBO (Precision Boost Overdrive) increases heat significantly
Monitoring Strategy for Ryzen
- Watch “CCD Tctl/Tdie” temps, not just “CPU Package”
- Check individual core temperatures (Ryzen Master shows this)
- Thermal limit is 95°C before aggressive throttling kicks in
- Sustained loads should stabilize below 90°C for best performance
- If one CCD runs 10°C+ hotter than the other, check cooler mount
If you’re trying to decide between Intel and AMD for your next build, especially considering thermal characteristics, our Intel vs AMD 2026 comparison breaks down the thermal and performance tradeoffs.
The Resolution Factor Everyone Forgets
Running 4K versus 1080p changes your thermal profile completely. Higher resolution means more GPU load, which means more heat generation. But it also means less CPU bottleneck, which might reduce CPU heat.
I switched from 1440p to 4K. My GPU temps went up 8°C. My CPU temps dropped 6°C. The workload shifted. Understanding this matters when diagnosing thermal issues.
If you’re seeing thermal issues that seem resolution-dependent, read about how resolution affects bottlenecks. It’s not just about FPS.
When Cooling Tweaks Aren’t Enough Anymore
I repasted. I optimized fan curves. I undervolted. Still hitting 92°C and throttling. Sometimes the hardware just can’t handle the heat you’re generating.

Signs You Need Better Cooling Hardware
Tweaks and optimizations have limits. Here’s when throwing money at the problem is actually the right answer:
Upgrade Your Cooler If
- Stock cooler still installed on high-TDP CPU (150W+)
- Air cooler struggling with sustained all-core loads
- 120mm AIO trying to cool 200W+ CPU
- Temps hit thermal limits despite perfect airflow and fresh paste
- System throttles even with aggressive fan curves
- You upgraded CPU to higher power tier without upgrading cooler
Don’t Upgrade If
- Temps are high but still under throttle threshold (under 90°C)
- Problem only occurs in unrealistic stress tests, not real usage
- Case airflow or paste application is clearly the issue
- Current cooler is already high-end (360mm AIO, premium air)
- Budget better spent on GPU or other component upgrade
- System meets your performance needs despite running warm
The Cost-Benefit Reality
A good tower air cooler costs $50-100. A 280mm AIO costs $120-180. A 360mm premium AIO costs $150-250. Meanwhile, case fans are $15-30 each. Thermal paste is $10-15.
Try the cheap fixes first. Fresh paste and better case airflow cost $50 total and solve 70% of thermal bottleneck problems. The expensive cooler is the nuclear option when nothing else works.
Cooler Upgrade Priority List
Work down this list. Most people fix their thermal issues before hitting step 6.
Planning a Hardware Upgrade?
Before you spend money on a new cooler or case, make sure thermal bottleneck is actually your main issue. CPU and GPU mismatches can cause similar symptoms. Our calculator helps you identify if your money is better spent elsewhere.
Why Some Games Cook Your Hardware More Than Others
Cyberpunk 2077 with path tracing makes my GPU scream. Meanwhile, Valorant barely registers. Different engines, different heat generation. Some games are thermal torture tests disguised as entertainment.

Unreal Engine 5: The Heat Generator
UE5 games push hardware harder than previous generations. Lumen and Nanite are graphically impressive but thermally expensive. These features stress both GPU and CPU simultaneously, creating system-wide heat buildup.
Games like Fortnite (post-UE5 update) and newer UE5 titles will thermal throttle systems that handle older games fine. It’s not poor optimization, it’s fundamentally more demanding rendering techniques.
If you’re struggling specifically with UE5 performance, we have a detailed breakdown of why your PC struggles with UE5 and what actually fixes it.
Path Tracing and Ray Tracing Thermal Impact
Ray tracing doubles GPU power consumption in some titles. Path tracing (full ray tracing) can triple it. That extra power becomes extra heat. Your cooling solution that handled rasterized graphics fine suddenly can’t keep up.
This is where the 5090’s 450W TDP becomes relevant. That power rating exists because path-traced games actually use it. If you play these titles, your thermal design needs to handle that power level.
Game-Specific Optimization
You don’t need to run everything maxed. Selectively reducing thermal-expensive settings preserves visual quality while cutting heat generation:
High Thermal Impact
- Ray tracing quality
- Path tracing enabled
- Reflection quality
- Global illumination
- Uncapped frame rates
Medium Thermal Impact
- Shadow quality
- Anti-aliasing level
- View distance
- Particle effects
- Post-processing
Low Thermal Impact
- Texture quality (VRAM limited)
- Anisotropic filtering
- Ambient occlusion
- Motion blur
- Depth of field
Dropping ray tracing from “Ultra” to “High” might save 40W and 10°C while being visually nearly identical. That’s the smart way to manage thermals without ruining your experience.
Keeping Your System Cool for the Long Haul
Thermal management isn’t a one-time fix. Dust accumulates. Paste dries out. Fan bearings wear. A system that ran cool at build time runs hot three years later if you ignore maintenance.

The Maintenance Schedule That Actually Works
I clean my system every 3 months. Takes 20 minutes. Prevents 90% of thermal degradation issues. Here’s the realistic maintenance plan:
Every 3 Months
- Compressed air clean all fans and heatsinks
- Wipe dust filters (if case has them)
- Check fan operation (any unusual noise or wobble)
- Verify all fans still spinning under load
- Quick visual inspection of cable routing
Every 12 Months
- Deep clean entire case interior
- Remove and clean all dust filters thoroughly
- Check all fan screws for vibration loosening
- Inspect thermal paste condition (GPU especially)
- Verify case fan speeds match BIOS settings
Every 24-36 Months
- Replace thermal paste on GPU and CPU
- Consider replacing case fans if bearing noise develops
- Inspect AIO tubing for kinks or damage (if applicable)
- Check thermal pad condition on VRAM and VRM
- Full system thermal retest to establish new baseline
Warning Signs Requiring Immediate Attention
- Sudden temperature increase (10°C+) with no system changes
- Fan making grinding, clicking, or scraping sounds
- Visible dust buildup on critical components
- System thermal throttling in previously stable scenarios
- Pump noise changes on AIO cooler
Dust: The Silent Thermal Killer
Dust acts as insulation. It fills gaps between heatsink fins, reducing surface area for heat transfer. It coats fan blades, reducing airflow efficiency. A heavily dusted system can run 15-20°C hotter than clean while consuming the same power.
Positive pressure cases with dust filters delay this but don’t prevent it. Even filtered intake pulls fine dust particles through. Clean regularly.
Cleaning Mistake: Don’t use a vacuum cleaner inside your PC. Static discharge can kill components. Use compressed air cans or electric air dusters. Hold fans still while blowing (prevents overspin damage to bearings). Work outside or in a garage to avoid dust redistributing in your room.
Thermal Paste Longevity Factors
High-quality paste lasts longer. But “longer” is relative. Even premium compounds like Thermal Grizzly Kryonaut or Noctua NT-H2 degrade after 3-4 years of constant heat cycling.
Monitor your baseline temps. If you recorded 72°C GPU temperature when the system was new, and it’s now hitting 88°C in the same games, paste degradation is likely. Don’t wait until throttling forces the issue.
The Bottom Line on Thermal Bottlenecks
Thermal bottleneck is fixable. It’s not like a weak CPU where you have to spend hundreds on an upgrade. Most thermal issues come down to basic physics fighting bad design choices.

The fixes aren’t complicated. Fresh thermal paste. Better case airflow. Smarter fan curves. Undervolting if you’re willing to test. These cost almost nothing compared to the performance you’re leaving on the table.
The hardest part is diagnosing thermal bottleneck correctly. Too many people blame their CPU or GPU when the real problem is heat. Monitor your temps. Compare them to clock speeds. Watch for the pattern where performance degrades as temperature climbs.
Final Verdict: Is It Worth Fixing?
If you’re losing 15-30% performance to thermal throttling, the answer is yes. An afternoon of maintenance and tuning gets that performance back for free. That’s better return on investment than any hardware upgrade.
But if your system runs warm (75-85°C) without actually throttling, you’re fine. Temperature alone isn’t the problem, performance loss is. Don’t chase perfect temps if you’re not losing frames.
The Reality: Modern hardware is designed to run hot. 80°C is not dangerous for a GPU. 85°C is normal for a high-power CPU under load. Throttling happens at 90-100°C+, not below. Don’t panic over numbers, focus on whether performance is dropping.
Start with the cheap fixes. Most thermal bottlenecks disappear with better case airflow and fresh paste. The expensive cooler upgrade is rarely necessary unless you’re pushing extreme hardware in demanding workloads.
Want to Make Sure You’re Fixing the Right Bottleneck?
Thermal issues are just one type of system bottleneck. Before you spend time or money on cooling upgrades, verify that heat is actually your main performance limiter. Our bottleneck calculator analyzes your complete system to show you where your money and effort will have the most impact.
What’s the weirdest performance issue you’ve ever run into?